I am not sure whether it was a flaw in the hardware design of the early LazyCat MicroServer or something else, but I ran into two hard drive failures in a short period of time. I do not know how the current MicroServer is, but the version I use is not easy to open for a drive replacement, and worse, two of the screws are stripped and will not come out at all. 😂 At first I tried to keep using the AI Pod only on my local network. Without the LazyCat MicroServer, I could not reach it from an external network at all, and leaving that much compute usable only at home felt like a real waste. So I had to find a way to access the AI Pod from outside without the LazyCat MicroServer.
This is not about walking away from LazyCat. The AI Pod is a LazyCat product too, and it works well for me. I still keep lzc-ai-agent running, and apps are still pulled from the LazyCat registry. I just do not want the AI Pod to depend on a MicroServer I can not open to replace the hard drive. And what if one day the newer LazyCat MicroServer makes replacing hard drives as easy as a Synology NAS? I might actually switch back to using it.
I wrote about Unconventional Usage of LazyCat MicroServer before, and back then that kind of tinkering felt like a lot of fun. The official AI app distribution and remote access are both managed through the MicroServer, which is a great all-in-one design in itself. But once the MicroServer goes down, the AI Pod instantly becomes a crippled device. So I had to loosely decouple them, so that when I am out, I can still reach the services on the AI Pod, such as Ollama, through the Cloudflare One client. This post records the whole process.
Anyway, back to the topic.
Why the AI Pod Depends on the MicroServer
Although the official docs clearly mention that the AI Pod and the MicroServer are two independent devices. The AI Pod comes with Ubuntu preinstalled. Plug in a keyboard, a mouse, and a monitor, and it is already a machine you can SSH into. I usually log in over Wi-Fi via SSH, and I can also attach a keyboard, a mouse, and a screen when needed.
Actually, they are not fully independent to each other because:
- The MicroServer is responsible for installing and distributing AI apps, and then
lzc-ai-agenton the AI Pod pulls the images and starts the containers. - Services are exposed through Traefik, usually with hostnames in the
*-aiform. - Remote access depends on the MicroServer’s built-in tunnel, rather than the AI Pod publishing an entry point itself.
So when the MicroServer has a problem, the local compute is still there, but both “remote access” and “managing apps through the MicroServer” are affected. Technically, the AI Pod can also be used as a standalone Ubuntu machine; you just have to set up the apps and the remote access yourself. 😂
What I Wanted
I set myself a fairly simple goal:
- Give the AI Pod a stable LAN IP, so I do not have to guess the address every time.
- Let the services I need listen on that IP. I will use Ollama as the example below; the same idea applies to other services.
- I built a Node.js portal myself, listening on Port
8088, to manage the various AI services running on the pod. - For remote access, I no longer use the MicroServer’s hostnames. I reuse the
cloudflaredinstance that already runs on the Synology NAS, and publish domains to these ports through a Cloudflare Tunnel. There is no need to install another copy ofcloudflaredon the AI Pod by reusing thecloudflaredon the NAS. - I keep
lzc-ai-agentrunning, so the AI Pod can still pull images from the LazyCat registry.
The overall plan looks like this:
Cloudflare One client
        │
        │  include only ai.example.com and ollama.example.com
        ▼
Cloudflare Access (WARP device check first; otherwise email one-time PIN)
        │
        ▼
Cloudflare Tunnel (cloudflared runs on the NAS)
        │
        ├── ai.example.com      →  192.168.x.y:8088   portal
        └── ollama.example.com  →  192.168.x.y:11434  OllamaCode language: CSS (css)
The domains and IP addresses below are placeholders. Please replace them with your own.
Give the AI Pod a Stable LAN Address
I did not set the static address on the AI Pod itself. I reserved it in the router’s DHCP settings (some UIs call this DHCP Reservation, address binding, or MAC binding). The AI Pod still uses DHCP, but it always gets the same 192.168.x.y.
Keep lzc-ai-agent Running
The AI Pod is still a LazyCat product, so I leave lzc-ai-agent running on purpose. Without it, pulling images from the LazyCat registry will fail.
Decoupling here means no longer depending on the MicroServer for remote access, routing, and day-to-day management. It does not mean removing LazyCat software from the pod, so do not stop or disable this service. If you want to confirm that it is still running, you can use:
systemctl status lzc-ai-agentCode language: Bash (bash)Check Ollama from the LAN
Ollama on the AI Pod runs in a Docker container. By default from the factory, LazyCat had already configured it to listen on all interfaces and to allow cross-origin requests from devices on the LAN:
services:
  ollama:
    image: registry.lazycat.cloud/catdogai/jetson-ollama:0.20.0
    environment:
      - OLLAMA_ORIGINS=*
      - OLLAMA_HOST=0.0.0.0
    ports:
      - 11434:11434Code language: YAML (yaml)
The image comes from LazyCat’s own registry, which is also why I leave lzc-ai-agent running: without it, pulling from that registry will fail. Because it already listens on 0.0.0.0 and publishes port 11434, the Tunnel on the NAS can reach the AI Pod directly. There is no need to change the listen address.
OLLAMA_ORIGINS=* allows cross-origin requests from any origin. In my case the remote entry point already sits behind Cloudflare, so this is acceptable; if you want tighter control, you can restrict this value.
So this step is only about verifying that it is reachable from the LAN:
curl http://127.0.0.1:11434
curl http://192.168.x.y:11434Code language: Bash (bash)
If everything is fine, both should return Ollama is running. I will not walk through every service below, and will keep using Ollama as the example.
Bring the Portal Up as Well
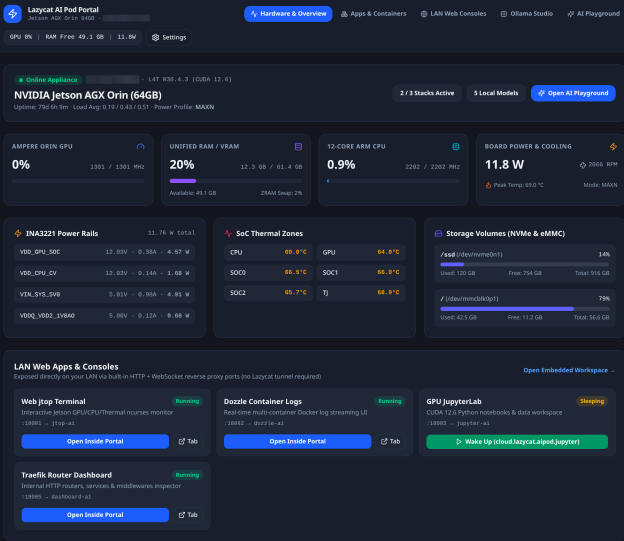
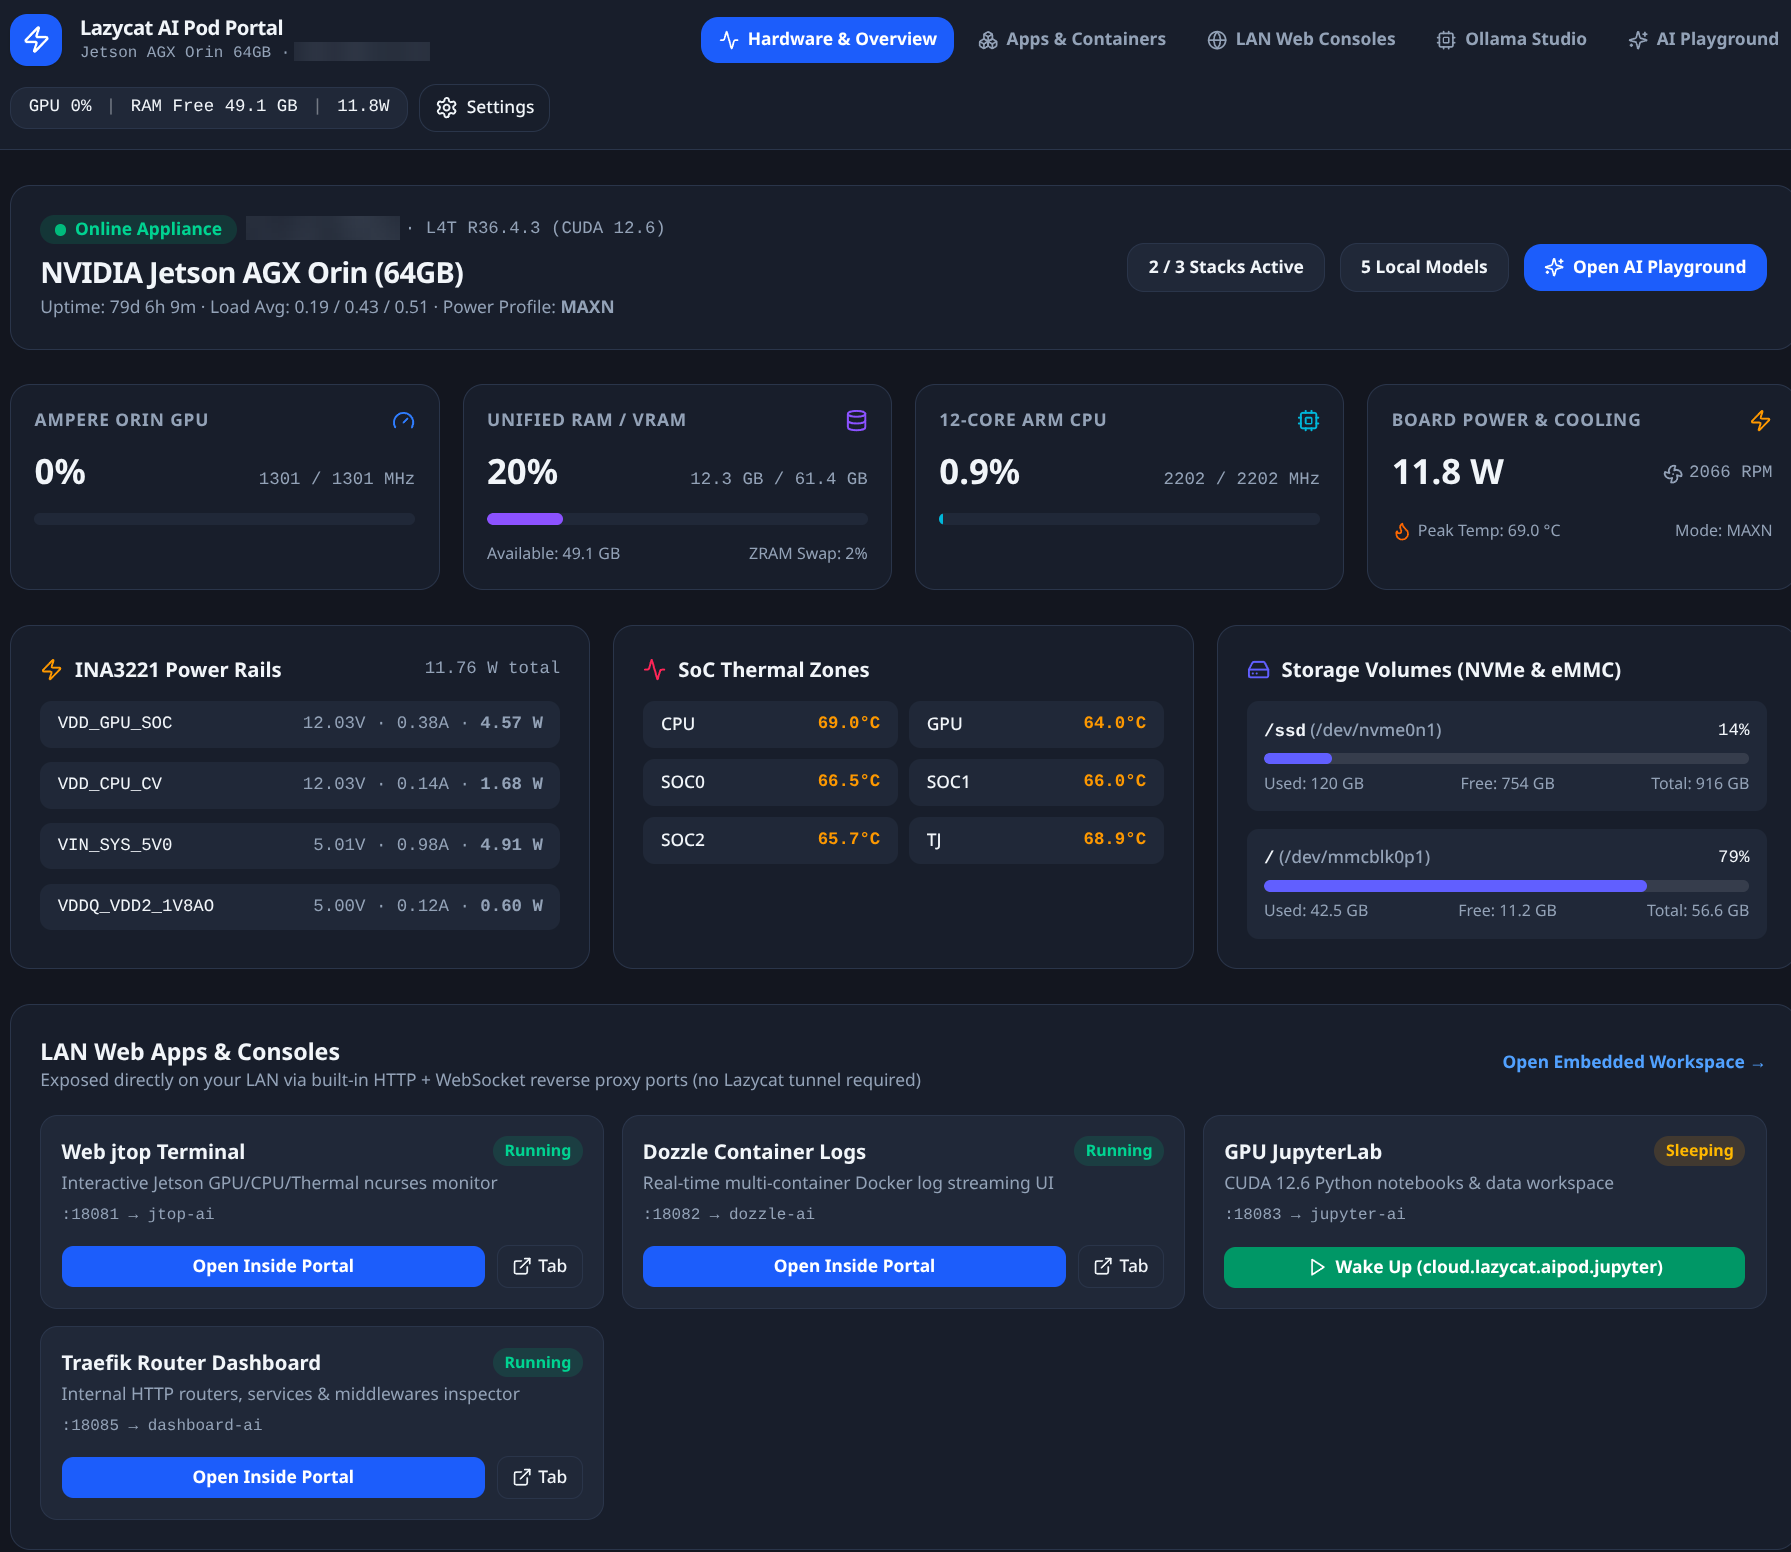
Since I can no longer use the MicroServer apps to manage the AI Pod, I had to build my own portal in Node.js to manage the various AI services running on it. It also runs in Docker on the AI Pod, and it uses network_mode: host, so it binds directly to host ports 8088 and 18081–18099. With restart: always, the Docker daemon brings it back up on boot.
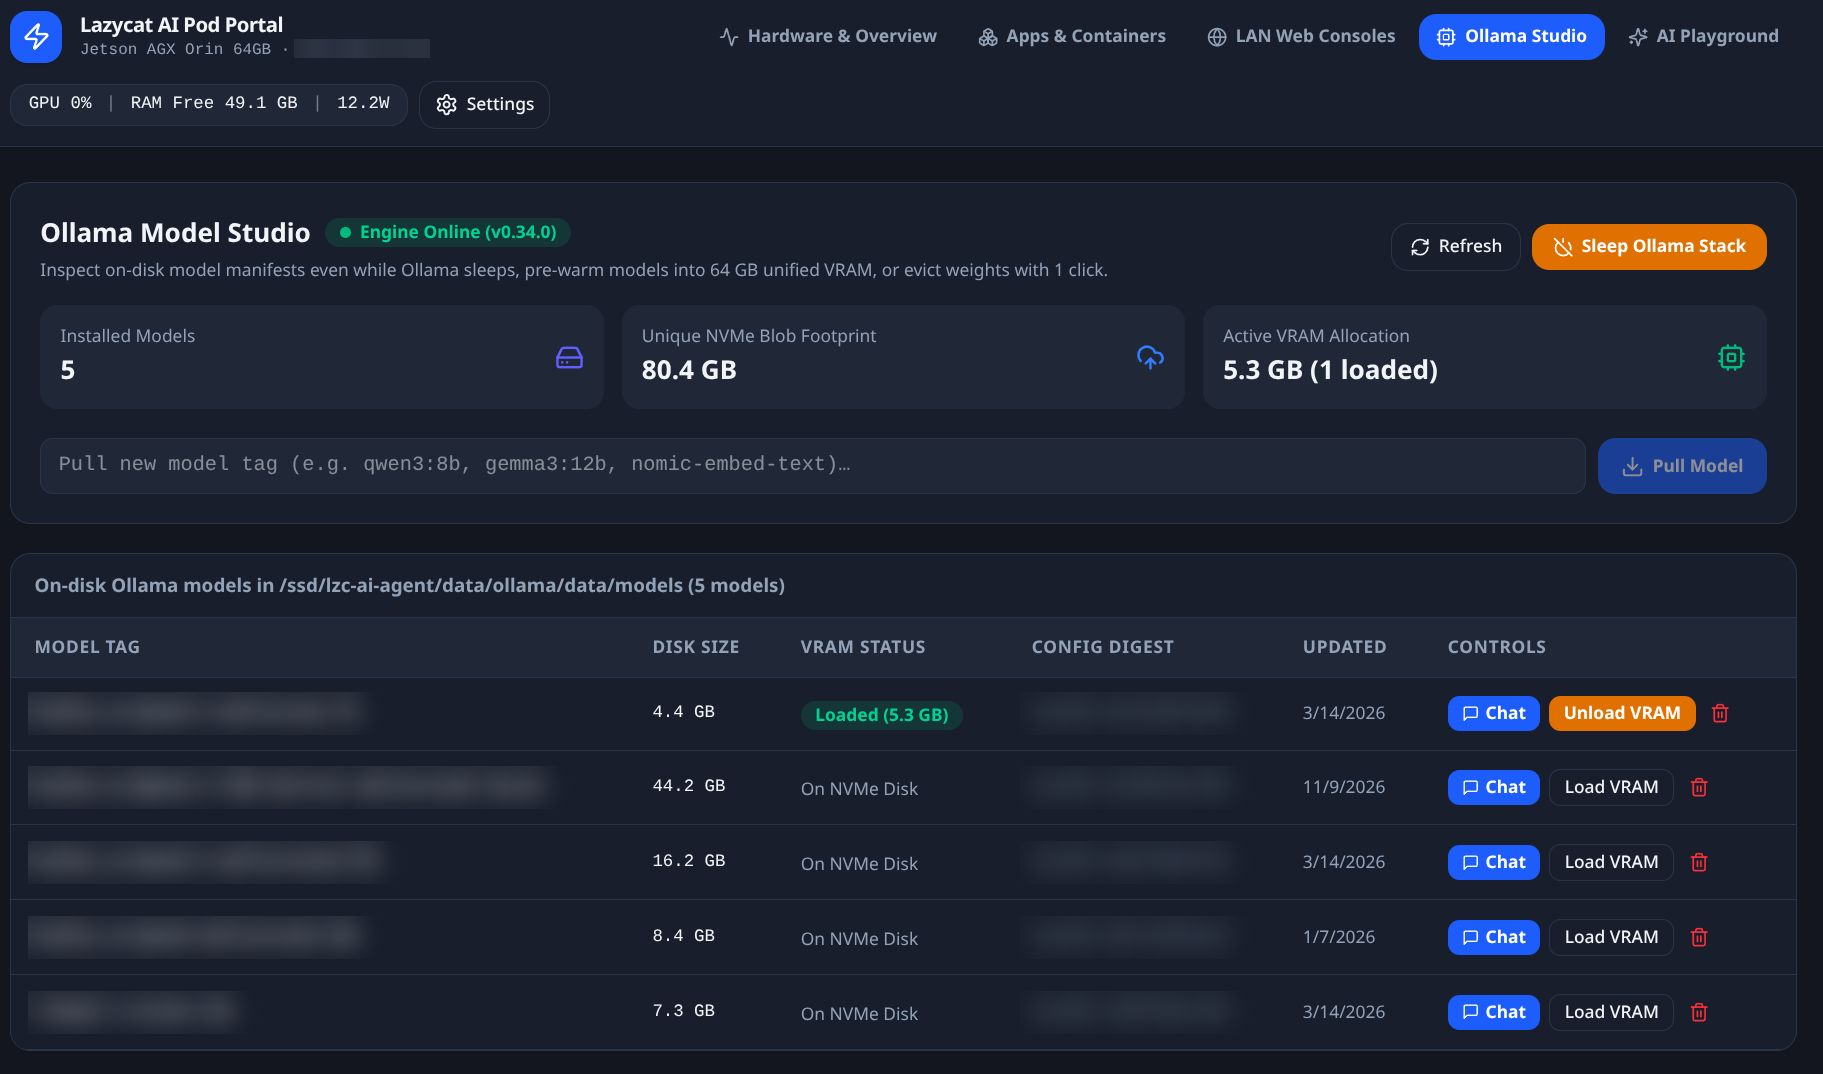
The portal also has an Ollama Studio page for viewing and managing the models in Ollama:
The Compose file looks roughly like this:
services:
  aipod-portal:
    container_name: aipod-portal
    image: aipod-portal:latest
    restart: always
    network_mode: host
    volumes:
      - /var/run/docker.sock:/var/run/docker.sock
      - /sys:/host/sys:ro
      - /proc:/host/proc:ro
      - /ssd:/ssd
      - /:/host/rootfs:roCode language: YAML (yaml)
Each of these mounts has its purpose: docker.sock is used to manage container stacks and read logs; /sys and /proc are mounted read-only so the portal can read live Orin GPU load, INA3221 power rails, fan RPM, and thermals; /ssd is used to read and write Compose configs and to scan local model blobs; / is mounted read-only at /host/rootfs to monitor root eMMC disk usage.
Mounting docker.sock gives the container root-equivalent control over Docker on the host, so this portal must never be exposed to the public Internet directly. That is what the Cloudflare section later on is for.
To start it, follow the logs, and restart it:
docker compose -f /ssd/aipod-portal/docker-compose.pod.yml up -d
docker logs -f aipod-portal
docker restart aipod-portalCode language: Bash (bash)
You can first confirm that the portal is alive on the pod and on the LAN:
curl -I http://127.0.0.1:8088
curl -I http://192.168.x.y:8088Code language: Bash (bash)
Publish Hostnames with Cloudflare Tunnel
For remote access, I did not install another cloudflared on the AI Pod. I reused the Tunnel that already runs on the Synology NAS. The NAS and the AI Pod are on the same LAN, so it is enough that the NAS can reach the corresponding ports on 192.168.x.y.
Note that I had already installed cloudflared on my NAS and the Tunnel was already running, so the steps below only add routes to an existing Tunnel. If you do not have a Tunnel yet, your steps will be a bit different from mine: first create a Tunnel and install cloudflared on a machine on your LAN (the NAS, the AI Pod, or any other always-on device) to connect it, then add the routes as described below.
In the Cloudflare dashboard, the steps are as follows (this is the path in the current documentation for the main dashboard):
- Open the Cloudflare dashboard, go to Networking → Tunnels, and open the Tunnel that is already running on the NAS. In my case there is no need to create a new one or to install another copy of
cloudflaredon the AI Pod. - Open the Routes tab, select Add route, then select Published application.
- Fill in the first one as follows:
- Subdomain:
ai - Domain: choose
example.comfrom the drop-down menu (replace this with your own domain) - Service URL:
http://192.168.x.y:8088
- Subdomain:
- Select Add route.
- Repeat the same steps for the second one: set the subdomain to
ollama, and set the Service URL tohttp://192.168.x.y:11434. - After that, check the DNS records. For a domain fully hosted on Cloudflare, the corresponding proxied CNAME records are usually created automatically. Just confirm that
ai.example.comandollama.example.comare in the Proxied state. Leave any other published applications you already have as they are; they will stay in this list and will not affect each other.
If you usually work in the Zero Trust dashboard, you can also find the same Tunnel under Zero Trust → Networks → Connectors. That said, the current step-by-step instructions for adding a published application to an existing Tunnel are written against the Networking → Tunnels path above.
If you want to compare this with the shape of the configuration, those two entries in the dashboard are roughly equivalent to:
ingress:
  - hostname: ai.example.com
    service: http://192.168.x.y:8088
  - hostname: ollama.example.com
    service: http://192.168.x.y:11434
  - service: http_status:404Code language: YAML (yaml)
The last 404 rule is a catch-all, so unmatched requests are not forwarded to some random local service. It is usually kept automatically when you add hostnames in the dashboard, so you do not have to change it on purpose.
Access and the Cloudflare One Client
Pointing the domains over is not enough. Both entry points should sit behind Cloudflare Access. I used the same set of policies as my existing self-hosted apps. Each application gets two policies, and the order matters.
First, create an application for the portal:
- Go to Zero Trust → Access controls → Applications, then select Create new application.
- Choose Self-hosted and private, then select Add public hostname.
- In the Domain drop-down menu, select your domain and fill in the subdomain so that you get
ai.example.com. You can name the application whatever you like, for exampleai. - I set a fairly long Session Duration (730 hours).
- Under Access policies, add the first policy, named for example
WARP:- Set the action to Service Auth
- In Include, choose Device posture or Warp, requiring the device to have passed the Cloudflare One Client check
- Add the second policy, named for example
Allow Me Only:- Set the action to Allow
- In Include, choose Emails and add your own email addresses
- Select Create. Then repeat the same steps to create another application for
ollama.example.com, keeping the two policies the same and only changing the domain to the Ollama one.
The idea is simple: a device that is already connected to the Cloudflare One client can go through directly; otherwise it falls back to an email OTP.
Then set up split tunneling on the client, so that only these two hostnames go through the tunnel:
- Go to Zero Trust → Team & Resources → Devices → Device profiles → General profiles.
- Locate the profile you actually use and select Configure.
- Find Split Tunnels and set the mode to Include IPs and Domains.
- Select Manage, and add only the hostnames that should go through Cloudflare, for example:
ai.example.comollama.example.com
- Save the profile (Save profile), then reconnect the Cloudflare One client once, so the new include list takes effect.
This way the client does not send all traffic from the device into the tunnel; it only forwards these two hostnames.
For clients that talk to the Ollama / OpenAI-compatible API, change the address to https://ollama.example.com and do not add a port. If the app expects the OpenAI-compatible path, keep /v1. These apps cannot complete the email PIN login by themselves, so they only work while the Cloudflare One client is on. If you later have an app that must reach Ollama with the client off, you can create a separate Access service token for it.
How to Confirm It Works
I checked in this order, from near to far:
- On the AI Pod itself:
curl http://127.0.0.1:11434andcurl -I http://127.0.0.1:8088both looked fine. - From another machine on the LAN, I repeated the same checks against both ports on
192.168.x.y, to confirm that other devices on the same network (including the NAS that runs the Tunnel) can reach them directly. - It is also worth curling the same addresses from the NAS, to confirm that the NAS running the Tunnel can reach the AI Pod. This step is often skipped, and it becomes hard to debug later if the public hostnames do not work.
- With the Cloudflare One client off, visiting
https://ai.example.comfrom an external network redirects to the Access login page. - With the client on, the portal opens directly, and
https://ollama.example.comworks as well.
I have tested step 5 from an external network: with the Cloudflare One client on, both the portal and Ollama already work end to end.
A Few Issues Worth Noting
The default device profile sends all traffic into the tunnel. As mentioned above, use Include mode for these hostnames, and make sure your device matches that profile. Do not fall through to a profile whose exclude list is empty.
Alright, that’s all for now. The MicroServer’s out-of-the-box experience is indeed convenient, but the AI Pod itself is already a complete Ubuntu machine. Once the address is stable, the services listen on the LAN, and the existing Tunnel publishes the hostnames, I can keep using my own compute without depending on the MicroServer. I still leave lzc-ai-agent running, so the AI Pod can pull images from the LazyCat registry. This setup is already working for me from outside. Hopefully this post can help a little for anyone who is also figuring out how to run the AI Pod without the MicroServer.