趁着生日,又赶上黑五,终于顺利批下预算入了一个新玩具: reMarkable 2。😂
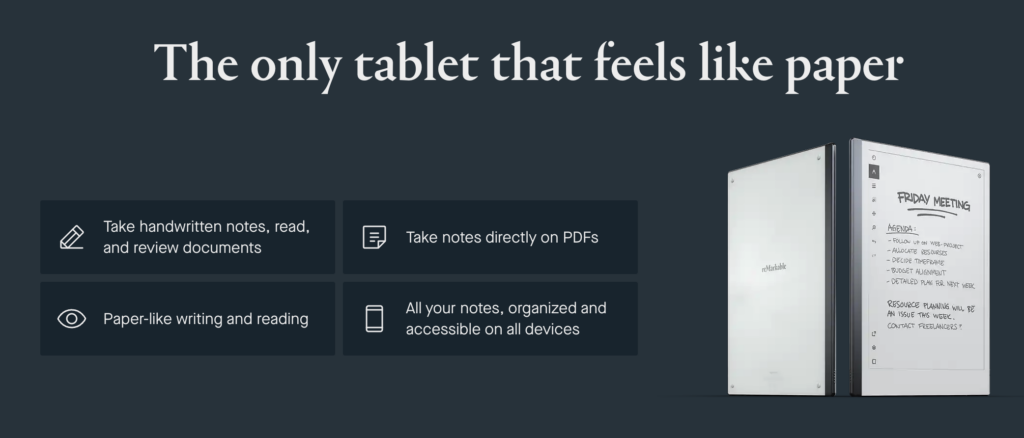
在入之前,就好几个哥们向我推荐过这个设备了。最终说服我自己购买的,不外乎是,它极致的纸质书写手感、轻薄的设计等等卖点。但当我用了 reMarkable 2 一段时间之后,发现它的实用性和可玩性远超我的想象。最让我出乎意料的一点是,reMarkable 的系统是基于 Linux 的,而且制造商还慷慨地开放了 SSH 和提供了 root 密码。
刚好赶上年底休假,我也把这玩意好好把玩了一下,顺便水一篇文章来当作笔记了。
功能完备性
语言问题
reMarkable 2 对于非拉丁文字的支持非常的糟糕,中日韩文字都会显示为方块,如下图。
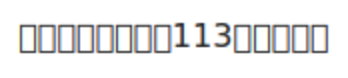
有个折中的解法是尽量阅读 PDF,但是我们也不能保证我们所阅读的 PDF 文档一定内嵌了所有必要字体。如果一些中日韩 CJK (Chinese, Japanese, and Korean) 字符依赖未内嵌的字体,在 reMarkable 上面还是会显示成方块。
好在 reMarkable 操作系统是基于 Linux,且开放 SSH 并提供了 root 密码,我们可以很方便的安装中日韩 CJK (Chinese, Japanese, and Korean) 字体。可以参考这个页面提供的 RMPKG 来安装。
cd /tmp;
wget https://files.davisr.me/projects/rcu/download-fontrmpkg/NotoSansCSFont.rmpkg
wget https://files.davisr.me/projects/rcu/download-fontrmpkg/NotoSansCTFont.rmpkg
wget https://files.davisr.me/projects/rcu/download-fontrmpkg/NotoSansJPFont.rmpkg
wget https://files.davisr.me/projects/rcu/download-fontrmpkg/NotoSansKRFont.rmpkg
chmod +x *.rmpkg
./NotoSansCSFont.rmpkg --install
./NotoSansCTFont.rmpkg --install
./NotoSansJPFont.rmpkg --install
./NotoSansKRFont.rmpkg --install
rm -f *.rmpkgCode language: Bash (bash)
这样子,reMarkable 内嵌的 Noto Sans 字体就会支持 CJK 字符的显示。
类型多样化
reMarkable 2 原生支持的文档格式只有 PDF 和 EPUB,这显然是远远不够的。Toltec 这个社区维护的针对 reMarkable 的免费软件源可以帮助到我。通过 Toltec 我们可以在 reMarkable 2 KOReader。依托于 KOReader 强大的格式兼容性,我们就可以用 reMarkable 阅读几乎所有主流格式的文档和书籍了。
## 安装完 Toltec 之后,通过 opkg 命令来安装 remux 和 KOReader
opkg update
opkg upgrade
# remux
# 支持多任务的启动器
opkg install remux
# KOReader
# 支持 PDF、DjVu、EPUB、FB2 等多种格式的电子书阅读器
opkg install koreaderCode language: Bash (bash)
值得一提的是,reMarkable 的原生书架和 KOReader 的书架不能共享,当然我们可以用一些云存储来解决,后面会详细介绍。另外一定要再三确认,Toltec 是否支持你所持有 reMarkable 的系统版本。
Toltec 里面还有很多有意思的应用,有兴趣的可以慢慢研究。
文章及文档管理
reMarkable 提供了一个浏览器插件。这个插件可以让用户点击一下就能将网页转换成 EPUB 文章并放到 reMarkable 的书架上。虽然方便,但是我用起来不怎么习惯:
- 插件转换成的 EPUB 内容的格式非常奇怪。
- Pocket 是我一直在使用的稍后阅读应用,我并不打算切到 reMarkable。另外我也不希望把所有收藏的页面都放在 reMarkable 书架上面。
于是我着手尝试将 Pocket 收藏的页面自动推送到 reMarkable ,又于是我想起了 n8n 这个开源的工作流自动化平台。
之前对 n8n 只是略有耳闻,这次尝试了一下,的确很方便。我将 n8n 部署在 NAS 上面,然后轻松完成了工作流的搭建,下图 n8n 对 Workflow 的展示和编辑 UI,非常的直观和友好。
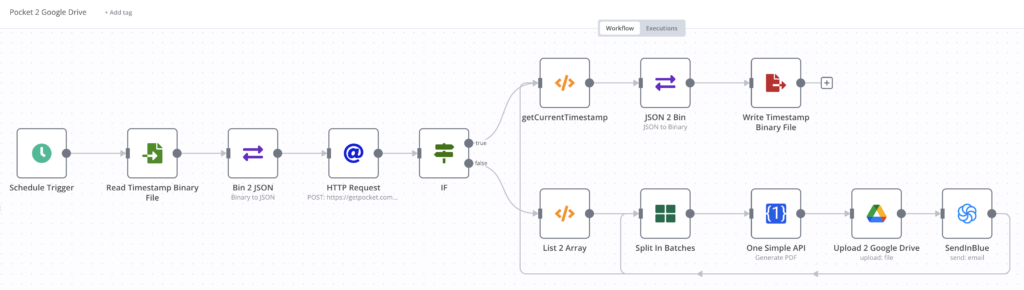
我通过调度器定时运行如上图工作流:
- 读取上一次检测的时间点,从 Pocket 读取该时间之后我所收藏的网址列表。Pocket 的获取 API 有一个 since 参数,通过这个参数我们可以排除掉所有这个时间点之前的网址,以避免重复拉取。
- 如果列表不为空,会使用 OneSimpleAPI 将这些页面依次转换成 PDF 文档并上传至 Google Drive。
- 把检测时间点更新为当前。
以上的 OneSimpleAPI 和 Google Drive 的工作流节点都是 n8n 原生支持的,调用起来非常方便。
在创建上面这个工作流的时候,有几点是需要注意:
- 我发现 Pocket 的 since 参数是以最后更新时间来作为参照物的,所以你如果希望把一些旧的页面推送至 Google Drive,可以将其做一些修改,例如:修改一下标签、重新收藏一下这个页面。下次被调度的时候,这个页面就会被推送至 Google Drive。
- 当你在 Pocket 中删除了一个收藏,Pocket 在彻底删除这个收藏之前,会先将这个收藏的状态改成为 2。所以在转换时需要过滤掉状态为 2 的收藏,以免将已删除的收藏被上传了。
- n8n 的 Google Drive 库支持两个认证方式,分别是 OAuth 2 和服务账号。OAuth 2 要求你的回调地址是使用域名的。出于安全考虑,我的 NAS 并没有开放外部直接访问,是需要 VPN 的,因此也没有绑定顶级域名。如果各位和我情况类似的话,请直接考虑使用服务账号。务必将用来上传文件的 Google Drive 目录已读写权限共享给服务账号,毕竟服务账号大概率并不是你的 Gmail。

其实我完全可以直接将文章直接放入 reMarkable 的书架,但我个人觉得这并不是一个好主意。我还是希望通过限制 reMarkable 书架上的数量,来保证我能够完成当面的阅读后,再去 Google Drive 选择新的读物。我不想让过多的文章来毁掉我的 reMarkable 书架。
我之前也提到 KOReader 和 reMarkable 2 不能共享书架,所以将文档和书籍放在 Google Drive 的中间云存储是一个既能保证书架有条理,也能保证两方都能方便拉取文档的最适合折中方案。
出版物管理
长久以来,我一直是使用 Calibre 来管理各种出版物,例如:小说、书籍、漫画和论文等等。后来有了 NAS,我又将 Calibre 的书库迁移到了 NAS 中,并在 Docker 容器中运行 Calibre Web,这样子我在任何设备都能对我的出版物收藏进行管理。
Calibre Web 其实并非是 Calibre 的官方出品,在 GitHub 也有不止一个 fork。我个人比较推荐 linuxserver.io 的镜像。假如你在部署 Calibre Web 之前没有使用过 Calibre,那你会需要一个初始的书库文件 metadata.db 。你可以安装 Calibre 来初始化一个,或者直接从这里下载。
Calibre Web 除了给用户提供了对 Calibre 的书库基于 Web 的管理能力,还支持 OPDS 目录。
The Open Publication Distribution System (OPDS) Catalog format is a syndication format for electronic
publications based on Atom and HTTP. OPDS Catalogs enable the aggregation, distribution, discovery,
and acquisition of electronic publications.OPDS Catalogs use existing or emergent open standards and conventions, with a priority on simplicity.
OPDS Catalog 1.2
这样子,我们就可以通过如下方法来搜索出版物:
# curl --user {username}:{password} "http://{IP}:{port}/opds/search/{queryString}"
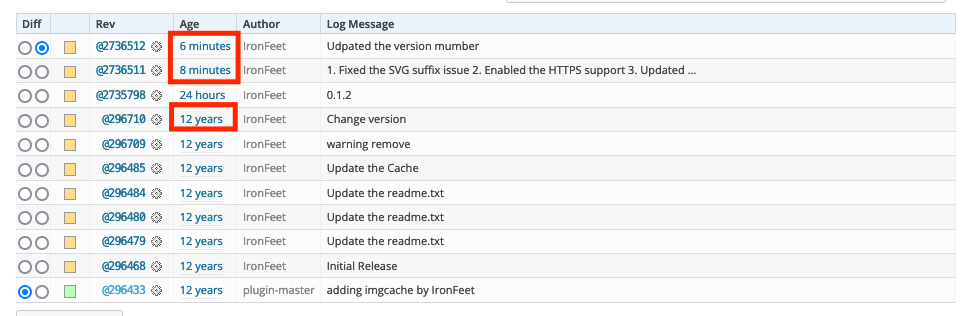
curl --user username:password "http://{IP of NAS}:8083/opds/search/root%20cause"Code language: Bash (bash)如能搜索到,ODPS 将会把出版物信息以 XML 格式返回,其中包括书名和下载链接:
<?xml version="1.0" encoding="UTF-8"?>
<feed
xmlns="http://www.w3.org/2005/Atom"
xmlns:dc="http://purl.org/dc/terms/"
xmlns:dcterms="http://purl.org/dc/terms/">
<id>urn:uuid:2853dacf-ed79-42f5-8e8a-a7bb3d1ae6a2</id>
<updated>2022-12-29T16:23:55+00:00</updated>
<link rel="self"
href="/opds/search/root cause?"
type="application/atom+xml;profile=opds-catalog;type=feed;kind=navigation"/>
<link rel="start"
href="/opds"
type="application/atom+xml;profile=opds-catalog;type=feed;kind=navigation"/>
<link rel="up"
href="/opds"
type="application/atom+xml;profile=opds-catalog;type=feed;kind=navigation"/>
<link rel="search"
href="/opds/osd"
type="application/opensearchdescription+xml"/>
<link type="application/atom+xml" rel="search" title="Search" href="/opds/search/{searchTerms}" />
<title>Calibre-Web</title>
<author>
<name>Calibre-Web</name>
<uri>https://github.com/janeczku/calibre-web</uri>
</author>
<entry>
<title>Root Cause Analysis Handbook</title>
<id>urn:uuid:06a66a9a-59d4-415b-a472-a413b8cf923d</id>
<updated>2022-12-22T07:56:20+00:00</updated>
<author>
<name>ABS Consulting</name>
</author>
<publisher>
<name>Rothstein Publishing</name>
</publisher>
<dcterms:language>eng</dcterms:language>
<category scheme="http://www.bisg.org/standards/bisac_subject/index.html"
term="Business & Economics"
label="Business & Economics"/>
<summary>Are you trying to improve performance, but find that the same problems keep getting in the way? Safety, health, environmental quality, reliability, production, and security are at stake. You need the long-term planning that will keep the same issues from recurring. Root Cause Analysis Handbook: A Guide to Effective Incident Investigation is a powerful tool that gives you a detailed step-by-step process for learning from experience. Reach for this handbook any time you need field-tested advice for investigating, categorizing, reporting and trending, and ultimately eliminating the root causes of incidents. It includes step-by-step instructions, checklists, and forms for performing an analysis and enables users to effectively incorporate the methodology and apply it to a variety of situations. Using the structured techniques in the Root Cause Analysis Handbook, you will: Understand why root causes are important. Identify and define inherent problems. Collect data for problem-solving. Analyze data for root causes. Generate practical recommendations. The third edition of this global classic is the most comprehensive, all-in-one package of book, downloadable resources, color-coded RCA map, and licensed access to online resources currently available for Root Cause Analysis (RCA). Called by users "the best resource on the subject" and "in a league of its own." Based on globally successful, proprietary methodology developed by ABS Consulting, an international firm with 50 years' experience in 35 countries. Root Cause Analysis Handbook is widely used in corporate training programs and college courses all over the world. If you are responsible for quality, reliability, safety, and/or risk management, you'll want this comprehensive and practical resource at your fingertips. The book has also been selected by the American Society for Quality (ASQ) and the Risk and Insurance Society (RIMS) as a "must have" for their members.</summary>
<link type="image/jpeg" href="/opds/cover/30" rel="http://opds-spec.org/image"/>
<link type="image/jpeg" href="/opds/cover/30" rel="http://opds-spec.org/image/thumbnail"/>
<link rel="http://opds-spec.org/acquisition" href="/opds/download/30/pdf/"
length="24812876" mtime="2022-12-22T07:56:20+00:00" type="application/pdf"/>
</entry>
</feed>Code language: HTML, XML (xml)有了对 OPDS 目录的支持,我创建了如下工作流来实现对出版物的搜索并将所有搜索文档都上传至 Google Drive。

我通过 Webhook 将搜索字符串传递给 OPDS 来搜索出版物。
其他
reMarkable 2 还有很多值得探索的地方,例如模板方面。reMarkable 2 对 PDF 格式支持的完成度惊到了我,尤其是对 PDF 内链的支持。很多电纸书,对 PDF 文档内的链接几乎是不支持的。即便是像目录这种非常必要的内链,也是通过调出目录列表来实现点击跳转,并不能直接在阅读过程中点击跳转。
我们可以通过 reCalendar 生成模板,然后用 reMarkable 2 以日月年维度来做计划和总结了。为了防止页面加载过慢,下面预览的时间跨度仅仅是两个月。大家可以根据需要在 reCalendar 定制你自己需要的特殊日子和时间跨度等等元素。
 Loading…
关于 reMarkable 2 的一些总结和分享就先到这了。我还会继续开发这个玩具,有新的再分享。😁